- GNOME Desktop Environment GNOME Desktop Environment
- Editors Editores
- Graphical Internet Graphical Internet
- Development Libraries Desenvolvimento Bibliotecas
- Development Tools Ferramentas de Desenvolvimento
- Server Configuration Tools Server Configuration Tools
- Administration Tools Administration Tools
- Base
- Fonts Fontes
- Legacy Fonts Legacy Fontes
- Hardware Support Hardware Support
- System Tools Ferramentas do Sistema
- X Window System X Window System
- Download Software Download Software
- Unpack Files Desembale Arquivos
- Hosts File Arquivo Hosts
- Set Kernel Parameters Definir Parâmetros do Kernel
- Setup Configuração
- Installation Instalação
- Post Installation Pós Instalação
Download Software
Baixar os seguintes softwares:Desembale Arquivos
Unzip the files: Descompacte os arquivos: unzip linux_11gR1_database.zip unzip linux_11gR1_database.zip Arquivo Hosts
The /etc/hosts file must contain a fully qualified name for the server: O arquivo / etc / hosts deve conter um nome totalmente qualificado para o servidor: Parâmetros do Kernel
Oracle recommend the following minimum parameter settings: Oracle recomendar parâmetro mínimo as seguintes definições:The current values can be tested using the following command: Os valores actuais pode ser testado utilizando o seguinte comando:kernel.shmall = 2097152 kernel.shmall = 2097152
kernel.shmmax = 2147483648 # Smallest of -> (Half the size of the physical memory) or (4GB - 1 byte) kernel.shmmax = 2147483648 # Smallest de -> (Metade do tamanho da memória física) ou (4 GB - 1 byte)
kernel.shmmni = 4096 kernel.shmmni = 4096
# semaphores: semmsl, semmns, semopm, semmni # Semáforos: semmsl, semmns, semopm, semmni
kernel.sem = 250 32000 100 128 kernel.sem = 250 32000 100 128
fs.file-max = 65536 # 512 * PROCESSES fs.file-max = 65536 # 512 * PROCESSOS
net.ipv4.ip_local_port_range = 1024 65000 net.ipv4.ip_local_port_range = 1024 65000
net.core.rmem_default=4194304 net.core.rmem_default = 4194304
net.core.rmem_max=4194304 net.core.rmem_max = 4194304
net.core.wmem_default=262144 net.core.wmem_default = 262144
net.core.wmem_max=262144 net.core.wmem_max = 262144
/sbin/sysctl -a | grep Run the following command to change the current kernel parameters: Execute o seguinte comando para alterar o actual kernel parâmetros:kernel.shmall = 2097152 kernel.shmall = 2097152
kernel.shmmax = 2147483648 kernel.shmmax = 2147483648
kernel.shmmni = 4096 kernel.shmmni = 4096
# semaphores: semmsl, semmns, semopm, semmni # Semáforos: semmsl, semmns, semopm, semmni
kernel.sem = 250 32000 100 128 kernel.sem = 250 32000 100 128
net.ipv4.ip_local_port_range = 1024 65000 net.ipv4.ip_local_port_range = 1024 65000
net.core.rmem_default=4194304 net.core.rmem_default = 4194304
net.core.rmem_max=4194304 net.core.rmem_max = 4194304
net.core.wmem_default=262144 net.core.wmem_default = 262144
net.core.wmem_max=262144 net.core.wmem_max = 262144
/sbin/sysctl -p / sbin / sysctl-p Add the following line to the /etc/pam.d/login file, if it does not already exist: Adicione a seguinte linha ao / etc / pam.d / login arquivo, se já não existe:oracle soft nproc 2047 oracle soft nproc 2047
oracle hard nproc 16384 oráculo duro nproc 16384
oracle soft nofile 1024 oracle soft nofile 1024
oracle hard nofile 65536 oráculo duro nofile 65536
Start the Firewall administration dialog (System > Administration > Firewall). Iniciar o diálogo Firewall administração (Sistema> Administração> Firewall). Click the "Disable" button followed by the apply button on the toolbar, then close the dialog. Clique no botão "Desativar" botão seguido do botão Aplicar na barra de ferramentas e, em seguida, feche a janela.session required /lib/security/pam_limits.so sessão exigida / lib / security / pam_limits.so
session required pam_limits.so sessão exigido pam_limits.so
Disable secure linux by editing the /etc/selinux/config file, making sure the SELINUX flag is set as follows, then reboot the server: Desactivar segura linux, editando o arquivo / etc / selinux / config arquivo, zelando selinux o sinalizador está definido como se segue e, em seguida, reinicie o servidor:
SELINUX=disabled Selinux = desativado Configuração
Install the following packages: Instale os seguintes pacotes:Create the new groups and users: Crie os novos grupos e usuários:# From Fedora 9 DVD # Do Fedora 9 DVD
# Should already be installed if you # Já deve estar instalado se você
# selected the recommended package groups. # Selecionado o pacote recomendado grupos.
cd /media/cdrom/Packages cd / media / cdrom / Pacotes
rpm -Uvh binutils-2.* rpm-Uvh binutils-2 .*
rpm -Uvh elfutils-libelf-0.* rpm-Uvh elfutils-libelf-0 .*
rpm -Uvh glibc-2.* rpm-Uvh glibc-2 .*
rpm -Uvh glibc-common-2.* rpm-Uvh glibc-common-2 .*
rpm -Uvh libgcc-4.* rpm-Uvh libgcc-4 .*
rpm -Uvh libstdc++-4.* rpm-Uvh libstdc + + -4 .*
rpm -Uvh make-3.* rpm-Uvh tornar-3 .*
rpm -Uvh elfutils-libelf-devel-0.* rpm-Uvh elfutils-libelf-devel-0 .*
rpm -Uvh glibc-devel-2.* rpm-Uvh glibc-devel-2 .*
rpm -Uvh gcc-4.* rpm-Uvh gcc-4 .*
rpm -Uvh gcc-c++-4.* rpm-Uvh gcc-c + + -4 .*
rpm -Uvh libstdc++-devel-4.* rpm-Uvh libstdc + +-devel-4 .*
rpm -Uvh unixODBC-2.* rpm-Uvh unixODBC-2 .*
cd / cd /
eject ejecte
# Not available on Fedora 9 DVD, but available from standard yum repository. # Não disponível no Fedora 9 DVD, mas disponível a partir de norma yum repositório.
yum install libaio libaio-devel yum instalar libaio libaio-devel
yum install unixODBC-devel yum instalar unixODBC-devel
yum install sysstat yum instalar sysstat
yum install compat-libstdc++ yum install compat-libstdc + +
Note. Nota. We are not going to use th "asmadmin" group, since this installation will not use ASM. Nós não estamos indo a utilização de "asmadmin" do grupo, uma vez que esta instalação não irá utilizar ASM.groupadd oinstall groupadd oinstall
groupadd dba groupadd dba
groupadd oper groupadd oper
groupadd asmadmin groupadd asmadmin
useradd -g oinstall -G dba,oper,asmadmin oracle useradd-g oinstall-G dba, oper, asmadmin oráculo
passwd oracle passwd oracle
Create the directories in which the Oracle software will be installed: Criar os diretórios em que o software Oracle será instalado:
Login as root and issue the following command: Login como root e emita o seguinte comando:mkdir -p /u01/app/oracle/product/11.1.0/db_1 mkdir-p / u01/app/oracle/product/11.1.0/db_1
chown -R oracle:oinstall /u01 chown-R oracle: oinstall / u01
chmod -R 775 /u01 chmod-R 775 / u01
xhost + redhat release 5 redhat libertação 5 # Oracle Settings # Oracle Settings
TMP=/tmp; export TMP TMP = / tmp; exportação PGT
TMPDIR=$TMP; export TMPDIR TMPDIR = $ TMP; exportação TMPDIR
ORACLE_HOSTNAME=f9.localdomain; export ORACLE_HOSTNAME ORACLE_HOSTNAME = f9.localdomain; exportação ORACLE_HOSTNAME
ORACLE_BASE=/u01/app/oracle; export ORACLE_BASE ORACLE_BASE = / u01/app/oracle; exportação ORACLE_BASE
ORACLE_HOME=$ORACLE_BASE/product/11.1.0/db_1; export ORACLE_HOME ORACLE_HOME = $ ORACLE_BASE/product/11.1.0/db_1; exportação ORACLE_HOME
ORACLE_SID=DB11G; export ORACLE_SID ORACLE_SID = DB11G; exportação ORACLE_SID
ORACLE_TERM=xterm; export ORACLE_TERM ORACLE_TERM = xterm; exportação ORACLE_TERM
PATH=/usr/sbin:$PATH; export PATH PATH = / usr / sbin: $ PATH; exportação PATH
PATH=$ORACLE_HOME/bin:$PATH; export PATH PATH = $ ORACLE_HOME / bin: $ PATH; exportação PATH
LD_LIBRARY_PATH=$ORACLE_HOME/lib:/lib:/usr/lib; export LD_LIBRARY_PATH LD_LIBRARY_PATH = $ ORACLE_HOME / lib: / lib: / usr / lib /; export LD_LIBRARY_PATH
CLASSPATH=$ORACLE_HOME/JRE:$ORACLE_HOME/jlib:$ORACLE_HOME/rdbms/jlib; export CLASSPATH CLASSPATH = $ ORACLE_HOME / JRE: $ ORACLE_HOME / jlib: $ ORACLE_HOME / RDBMS / jlib; exportação CLASSPATH
if [ $USER = "oracle" ]; then if [$ USER = "oracle"]; então
if [ $SHELL = "/bin/ksh" ]; then if [$ SHELL = "/ bin / ksh"]; então
ulimit -p 16384 ulimit-p 16384
ulimit -n 65536 ulimit-n 65536
else diferente
ulimit -u 16384 -n 65536 ulimit-u 16384-n 65536
fi
fi
Instalação
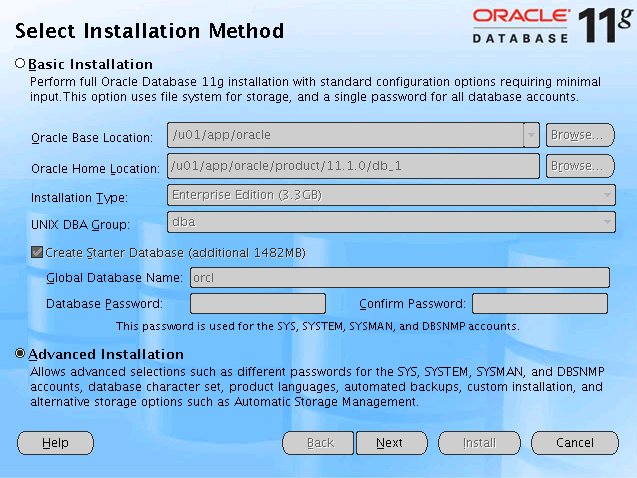
Log into the oracle user. Entrar para o oráculo usuário. If you are using X emulation then set the DISPLAY environmental variable: Se você estiver usando X emulação, em seguida, defina a variável ambiental DISPLAY: DISPLAY=:0.0; export DISPLAY DISPLAY = : 0,0; export DISPLAY ./runInstaller . / runInstaller - Select Installation Method Selecionar método de instalação
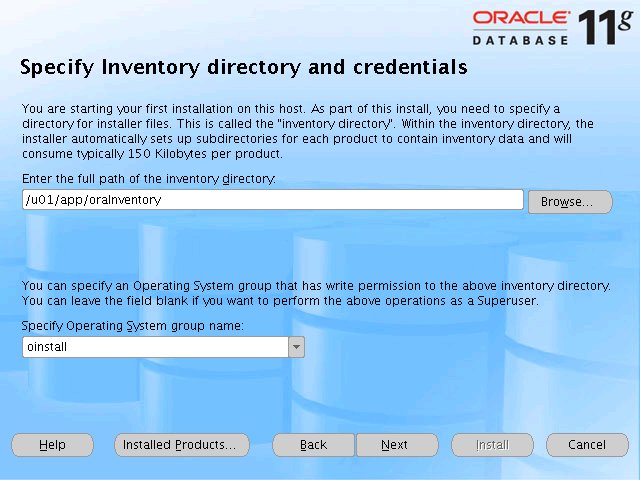
- Specify Inventory Directory and Credentials Especifique Inventário Directory e Poderes
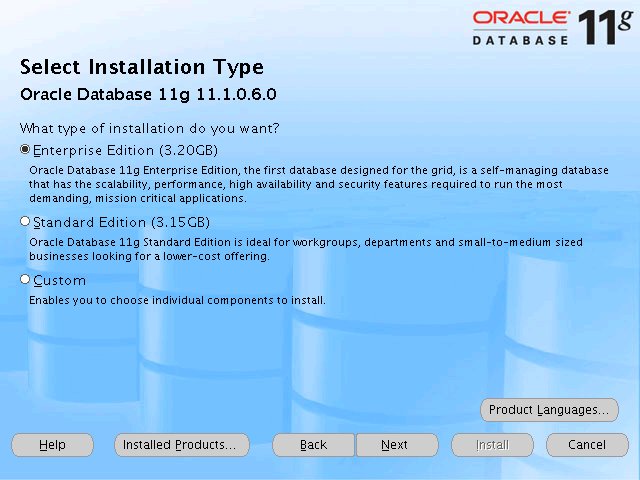
- Select Installation Type Selecionar Tipo de Instalação
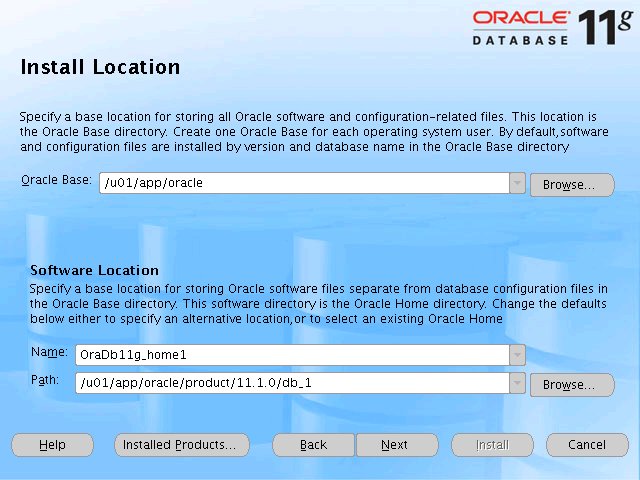
- Install Location Local de instalação
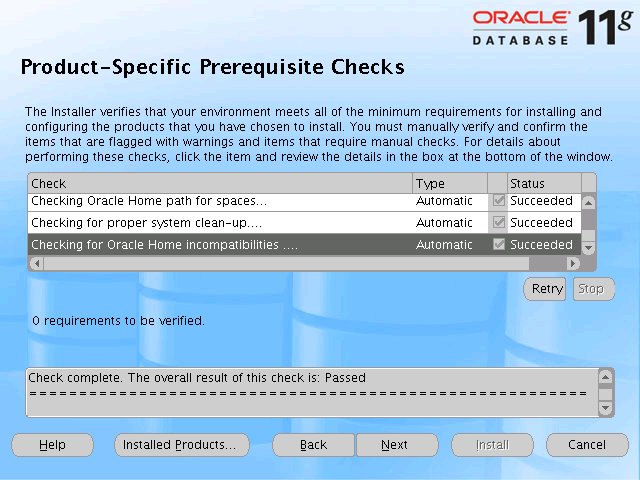
- Product-Specific Prerequisite Checks Medicamento específico Prerequisite Cheques
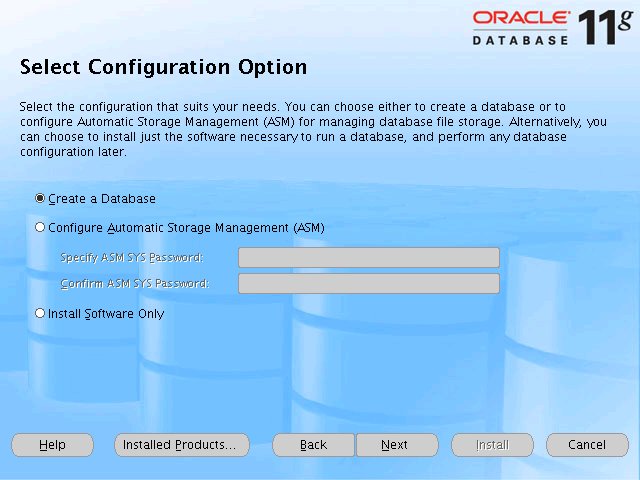
- Select Configuration Option Seleccione Configuração Opção
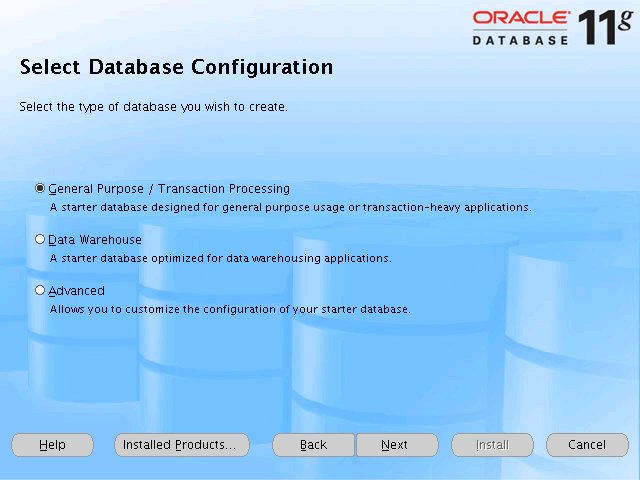
- Select Database Configuration Selecione Configuração de Dados
- Specify Database Configuration Options Especifique Database Configuration Opções
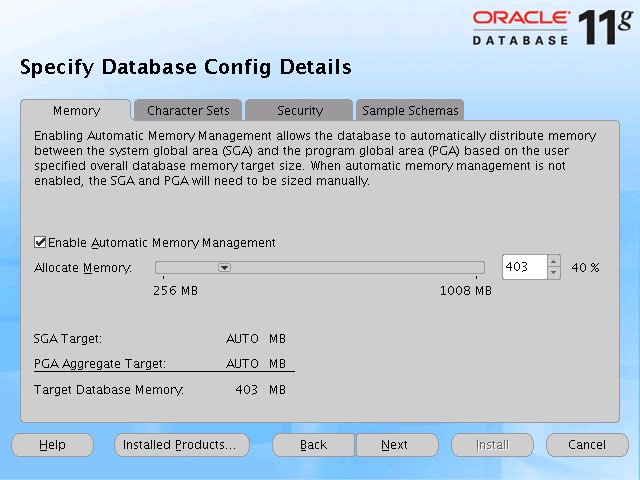
- Specify Database Configuration Details Especifique Database Configuration Details
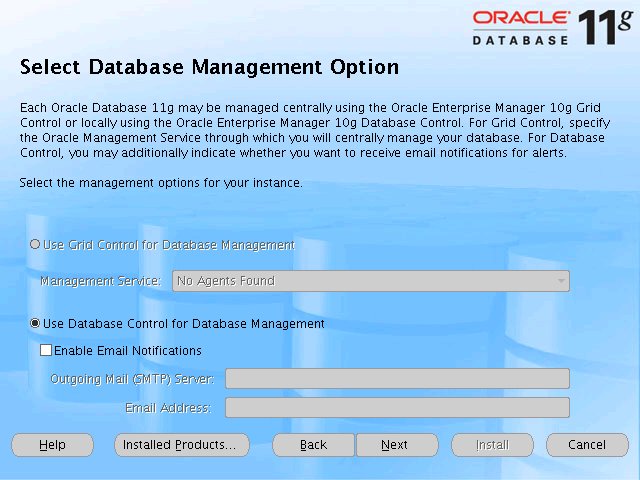
- Select Database Management Option Selecione Database Management Opção
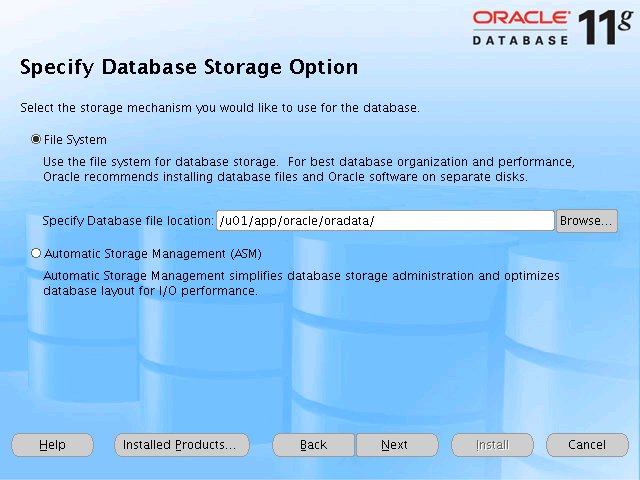
- Specify Database Storage Option Especifique Armazenamento de Dados Opção
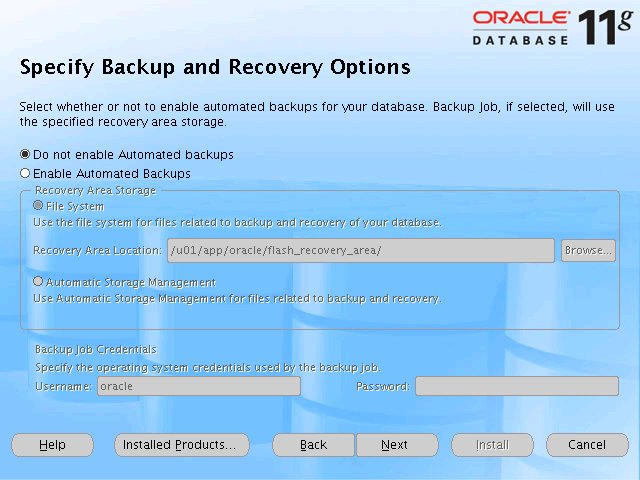
- Specify Backup and Recovery Options Especifique Opções Backup e Recuperação
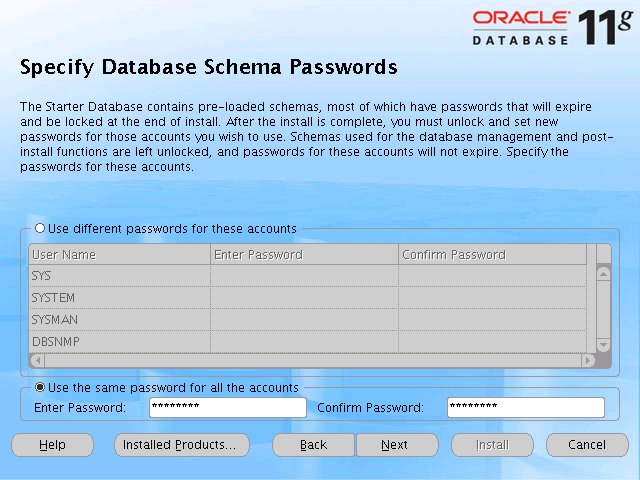
- Specify Database Schema Passwords Especifique Database Schema Senhas
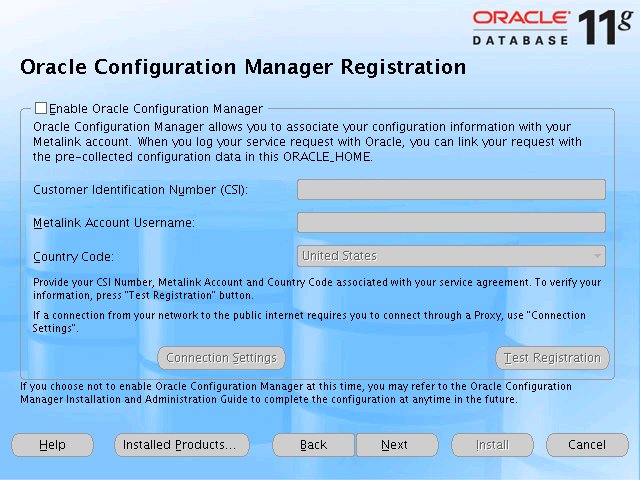
- Oracle Configuration Manager Registration Oracle Configuration Manager Registration
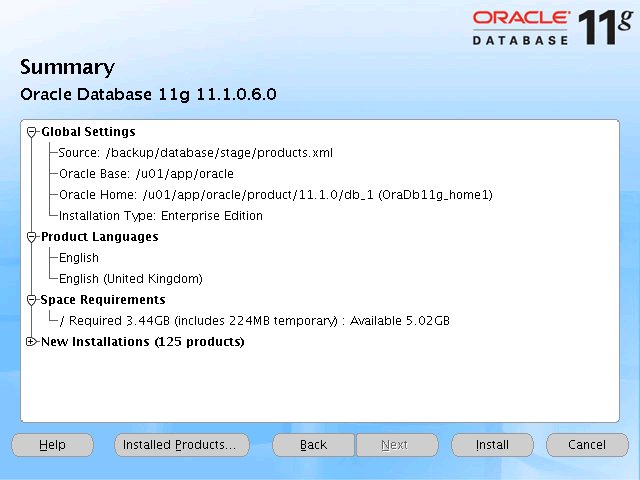
- Summary Resumo
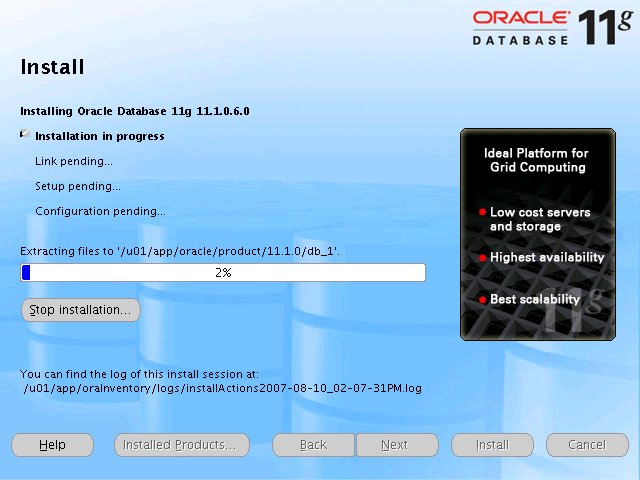
- Install Instalar
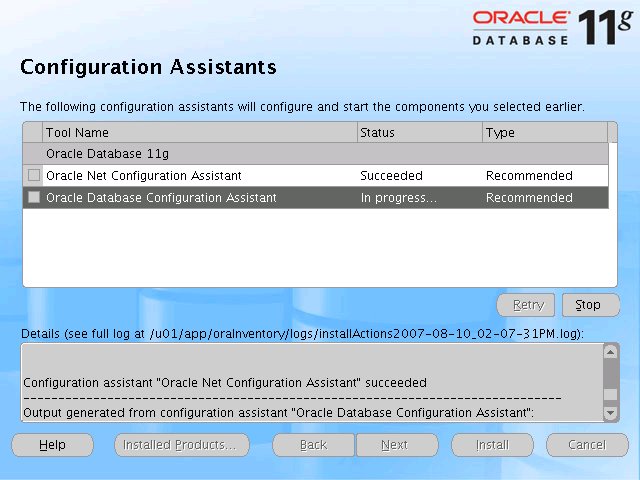
- Configuration Assistants Configuração Assistentes
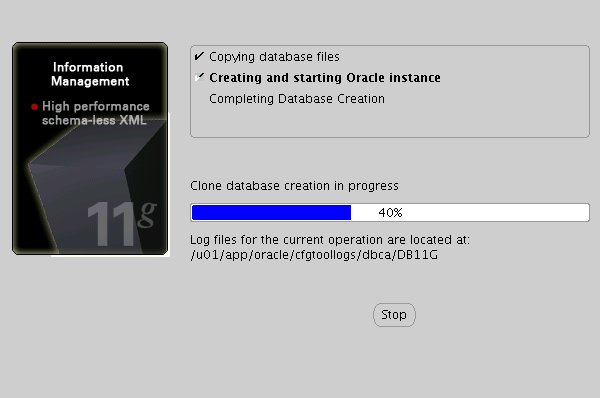
- Database Configuration Assistant Assistente de Configuração de Dados
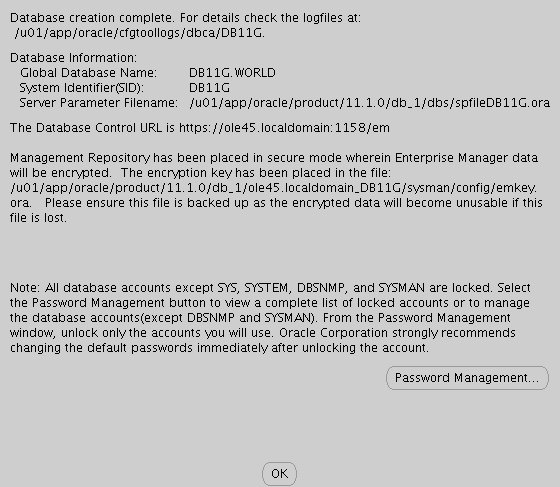
- DatabaseConfiguration Assistant Summary Assistente DatabaseConfiguration Síntese
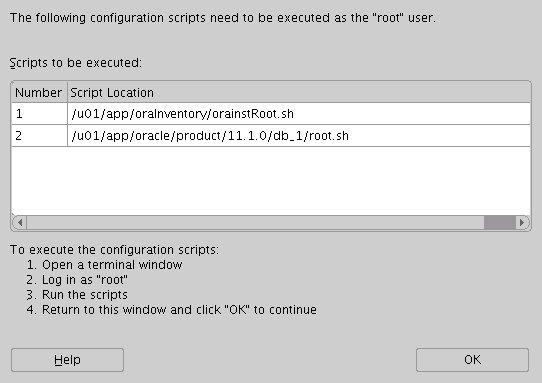
- Execute Configuration Scripts Executar configuração Scripts
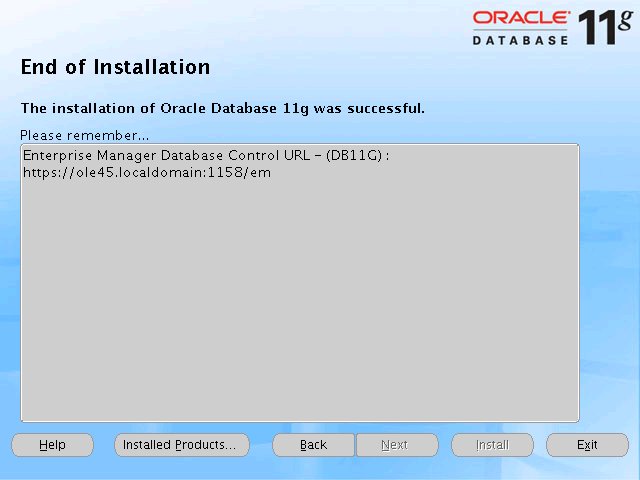
- End of Installation Fim da instalação
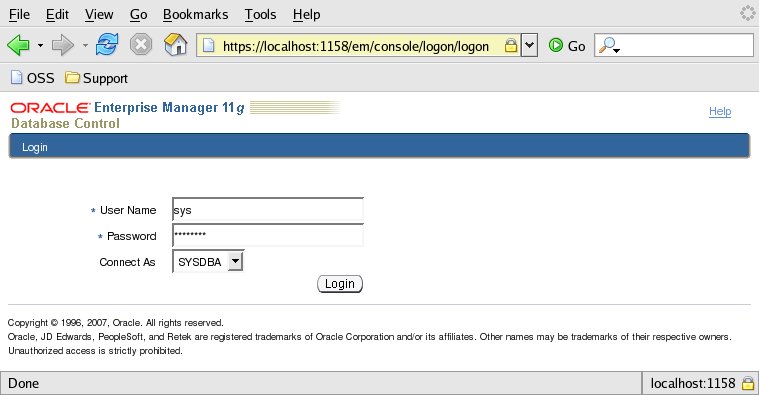
- OEM Database Control Login OEM Database Controle Login
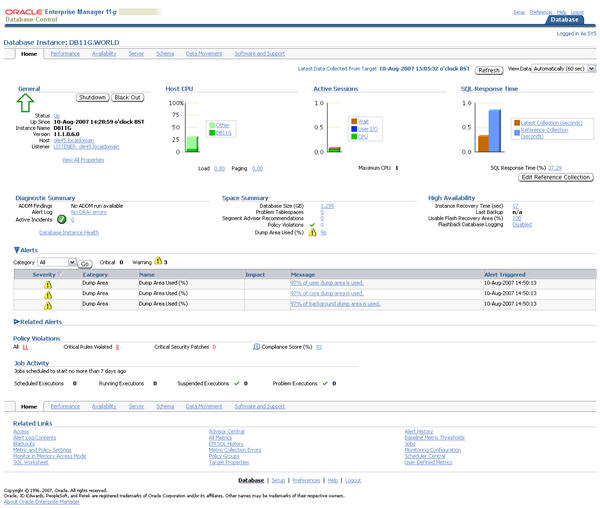
- OEM Database Control OEM Database Control
Pós Instalação
Edit the /etc/redhat-release file restoring the original release information: Edite o arquivo / etc / redhat-release restaurar o arquivo original de lançamento informações: Fedora release 9 (Sulphur) Fedora release 9 (Sulphur) DB11G:/u01/app/oracle/product/11.1.0/db_1:Y DB11G: / u01/app/oracle/product/11.1.0/db_1: Y - Oracle Database Installation Guide 11g Release 1 (11.1) for Linux Guia de Instalação Oracle Database 11g Release 1 (11.1) para Linux
- Automating Database Startup and Shutdown on Linux Automatizar Database de desligamento e inicialização do Linux


Nenhum comentário:
Postar um comentário